- Photo Safaris
- Alaska Bears & Puffins World's best Alaskan Coastal Brown Bear photo experience. Small group size, idyllic location, deluxe lodging, and Puffins!
- Participant Guestbook & Testimonials Candid Feedback from our participants over the years from our photo safaris, tours and workshops. We don't think there is any better way to evaluate a possible trip or workshop than to find out what others thought.
- Custom Photo Tours, Safaris and Personal Instruction Over the years we've found that many of our clients & friends want to participate in one of our trips but the dates we've scheduled just don't work for them or they'd like a customized trip for their family or friends.
- Myanmar (Burma) Photo Tour Myanmar (Burma) Photo Tour December 2017 -- with Angkor Wat option
- Reviews Go hands-on
- Camera Reviews Hands-on with our favorite cameras
- Lens reviews Lenses tested
- Photo Accessories Reviews Reviews of useful Photo and Camera Accessories of interest to our readers
- Useful Tools & Gadgets Handy tools and gadgets we've found useful or essential in our work and want to share with you.
- What's In My Camera Bag The gear David Cardinal shoots with in the field and recommends, including bags and tools, and why
- Articles About photography
- Getting Started Some photography basics
- Travel photography lesson 1: Learning your camera Top skills you should learn before heading off on a trip
- Choosing a Colorspace Picking the right colorspace is essential for a proper workflow. We walk you through your options.
- Understanding Dynamic Range Understanding Dynamic Range
- Landscape Photography Tips from Yosemite Landscape Photography, It's All About Contrast
- Introduction to Shooting Raw Introduction to Raw Files and Raw Conversion by Dave Ryan
- Using Curves by Mike Russell Using Curves
- Copyright Registration Made Easy Copyright Registration Made Easy
- Guide to Image Resizing A Photographers' Guide to Image Resizing
- CCD Cleaning by Moose Peterson CCD Cleaning by Moose Peterson
- Profiling Your Printer Profiling Your Printer
- White Balance by Moose Peterson White Balance -- Are You RGB Savvy by Moose Peterson
- Photo Tips and Techniques Quick tips and pro tricks and techniques to rapidly improve your photography
- News Photo industry and related news and reviews from around the Internet, including from dpreview and CNET
- Getting Started Some photography basics
- Resources On the web
- My Camera Bag--What I Shoot With and Why The photo gear, travel equipment, clothing, bags and accessories that I shoot with and use and why.
- Datacolor Experts Blog Color gurus, including our own David Cardinal
- Amazon Affiliate Purchases made through this link help support our site and cost you absolutely nothing. Give it a try!
- Forums User to user
- Think Tank Photo Bags Intelligently designed photo bags that I love & rely on!
- Rent Lenses & Cameras Borrowlenses does a great job of providing timely services at a great price.
- Travel Insurance With the high cost of trips and possibility of medical issues abroad trip insurance is a must for peace of mind for overseas trips in particular.
- Moose Peterson's Site There isn't much that Moose doesn't know about nature and wildlife photography. You can't learn from anyone better.
- Journeys Unforgettable Africa Journeys Unforgettable -- Awesome African safari organizers. Let them know we sent you!
- Agoda International discounted hotel booking through Agoda
- Cardinal Photo Products on Zazzle A fun selection of great gift products made from a few of our favorite images.
- David Tobie's Gallery Innovative & creative art from the guy who knows more about color than nearly anyone else
- Galleries Our favorite images
Tiffen Dfx v3: World’s leader in film filters goes digital–helps me recreate history
Tiffen Dfx v3: World’s leader in film filters goes digital–helps me recreate history
Submitted by David Cardinal on Thu, 08/30/2012 - 10:00
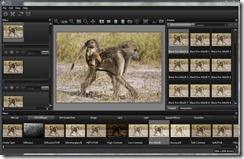 Like many pro photographers, I’ve gotten used to relying on filters from nik Software to augment those found in Photoshop. Tiffen, to me, was a name associated with glass filters, not digital ones. But when Mike Rubin, who I greatly respect, made the jump from Nikon to Tiffen, my ears perked up and I had to learn more. I’m glad I did. Mike introduced me to Tiffen Dfx v3 plug-in for Photoshop (as well as Lightroom and Aperture). At first I wasn’t sure I needed yet another plug-in for Photoshop, as I already use a variety of others. After firing up Dfx, though, I realized it took a different approach than any other filter set I’d used, starting by recreating Tiffen’s legacy of film filters for digital, making it feel much more like a traditional darkroom tool – except on steroids…
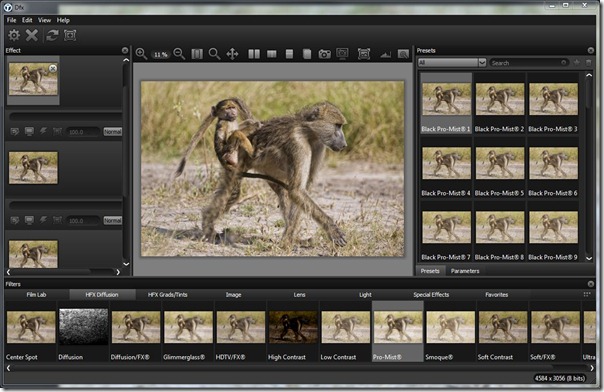
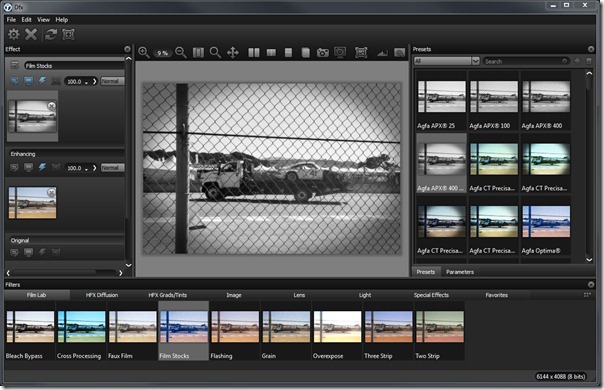
What I noticed first about Dfx was the wide-range of traditional photo filters and photo effects – totaling over 2,000. Tiffen’s long history in physical filters gives them the technical knowledge needed to reimplement those in digital form. Coupled with cross-processing and film stock filters, as well as a litany of darkroom effects, Dfx not only recreates a film darkroom, but goes well beyond anything we could do with glass and chemicals.
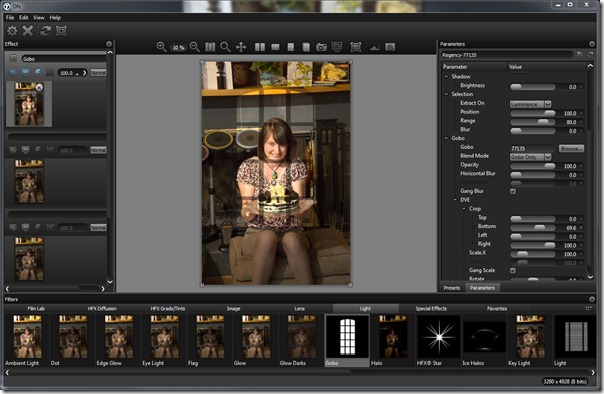
In addition, Dfx adds a variety of very interesting lighting and other effects for those who want to break the bounds of “found view” images and enhance them. I particularly enjoyed the filtered light “gobo” effect, although I have to admit I don’t really have much call for it in wildlife or sports photography. Dfx also includes nice masking capability, and some of the effects allow integrated sharpening.
Dfx filter workflow
One major difference between Dfx and many other plug-in solutions is that it offers the option to apply several different filters at once, instead of requiring each one to be its own layer. nik has added this feature to Color Efex 4.0, so the option isn’t unique, but it is still quite powerful. Essentially Dfx becomes its own mini-Photoshop or mini-Lightroom, at least as far as applying filters and effects.
The Dfx interface takes a little getting used to, as it varies from the interface of Photoshop itself (so does nik, so either set of filters has a learning curve). There are good tooltips over all the icons, fortunately, as they aren’t all intuitive. To get going, I made substantial use of the tooltips and also of the excellent help system which essentially doubles as an electronic manual.
Dfx features an excellent and fully integrated mask creation toolset, so you can preview and apply your filters to only a selected portion of the image directly in the Dfx user interface. This is different from nik’s filters where you go back to Adobe’s user interface to create the mask. Which you prefer will probably depend on which masking system you like better, but you can always apply a Dfx filter to the entire image and then create a mask for that layer in Photoshop if you want.
Dfx, like many modern filter sets, will optionally run as a Smart Filter, allowing its use on a Photoshop Smart Object, in a non-destructive way. One great thing about using Dfx as a Smart Filter is that you can go back and modify the settings at any time. This flexibility is incredibly valuable if you decide you want your final image to be prepared for a different purpose, or just want to update its look. I use them quite often now, unless I need to do some additional tweaking in Photoshop that isn’t compatible with them.
New in Dfx v3.0
For those familiar with Tiffen’s Dfx filters, version 3 adds a number of powerful new features, including Color Shadow, as well as the nifty DeBand, DeNoise and DeBlock to fix problem images. DeBand in particular is helpful for troublesome blue sky areas. The library of 113 film stocks is also a lot of fun and can help you recreate almost any traditional darkroom film look. The new Key Light filter rivals the one in Photoshop CS6 as a way to revise the lighting of your images after the fact. Personally I also love all the gobo choices in the new version. v3 has also been optimized to take advantage of multiple processing cores.
For the growing number of Lightroom users, v3 also adds full support for running as a Lightroom plug-in. Conversely, the standalone version of Dfx v3 is powerful enough to be considered as an alternative to Lightroom’s Develop module.
Re-creating the past with Dfx v3
 Dfx's 125 filters are far too many to review in detail without writing a book, so rather than try to cover them all, I thought a case study would be a good way to see how I’ve made use of the product. In this case I chose a race car photo project I’ve been promising to do for a friend.
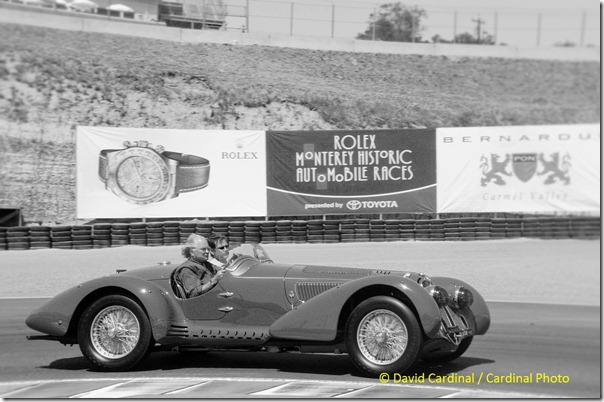
I love looking at historic race car photos almost as I enjoy photographing them in a modern setting every summer at the Monterey classic car races. Unfortunately, there really isn’t any way to recreate the great moments in motorsports history outside a movie set. Safety rules dictate fences and tire barriers at almost all tracks, while drivers are often wearing Nomex suits and full-face helmets when they race now. So it was a good opportunity when veteran driver Ivan Zaremba got to do a pace lap at Laguna Seca in street clothes and an open car – specifically Ralph Lauren’s famous Alpha Romeo 8C 2900.
I thought this would be a good photo to give a historic look. There wouldn’t be much I could do to get rid of the tires (although those certainly could have been around the track historically), but I could change the look of the image. Tiffen Dfx seemed like the perfect tool for the job, so I dove right into the task.
Cropping out the present
While chain link fences aren’t new, there are certainly a lot more of them around than their would have been decades ago. A quick crop, either in the Camera Raw module or in Photoshop or Lightroom, helps get rid of some of the ugly background. In addition, cropping helps make it appear that I’m closer to the vehicle. Even though I was covering the event from the media cutout along the track, photographers decades ago would have been able to get even closer.
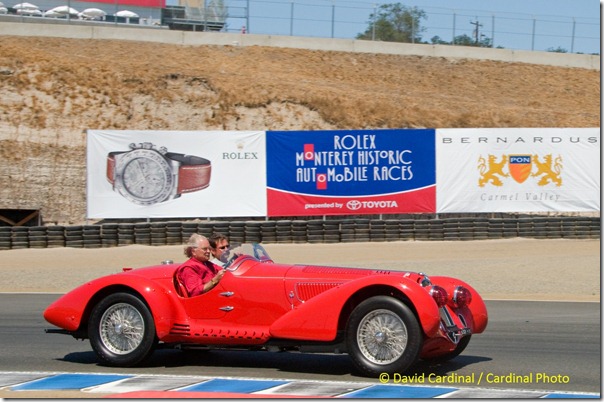
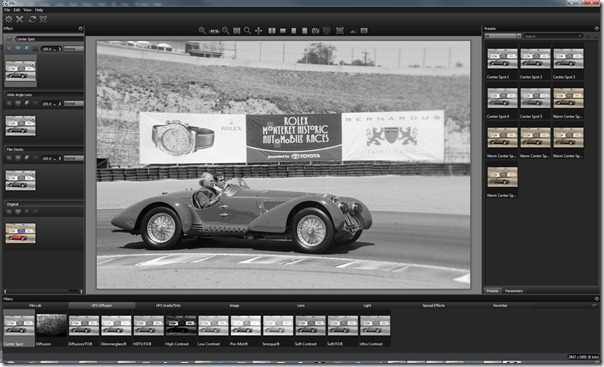
To help enhance the illusion of being closer to the car, Tiffens Wide Angle Lens filter provided some of the forced perspective, and distortion, I would have had shooting near the car with a wide-angle lens. I’ve amplified the effect here to make it easily visible, but its trivial to change the parameters to suit the look you want.
Choosing your film stock
While there may not be too much need to recreate film stock in today’s market, the popularity of low-end tools like Instagram shows there is plenty of interest in historic looks. Dfx delivers with lots of film stock and other filters designed to recreate the looks of yesteryear. In this case I chose an Agfa 100 ASA film stock that rendered the image accurately, with only a small amount of grain.
The film filters offer the ability to sharpen your image at the same time. I took this opportunity to sharpen my image, since I hadn’t applied any sharpening in Photoshop.
Isolating the subject
When I shot this image, I deliberately used a higher ISO and small aperture, since I wanted to show the sponsor logos and have them readable. If instead I had actually been shooting with an ASA 100 (today the equivalent of ISO 100) I might have shot wide open – which also would have isolated and highlighted the car.
Tiffen’s Center Spot filter makes recreating a similar effect easy. You can pick the radius of the sharp area, and control how it falls off. One advantage the digital filter offers is the ability to move the center of focus around in the image – which is necessary since we can’t actually determine after the fact which parts of the image are in the focal plane, so setting an area of the image to be sharp is as close as we can come. Aside from the modern Toyota logo, the image now looks quite similar to one that might have been captured back in the day when this gorgeous car was racing for real, thanks to Tiffen’s Dfx v3 filters.
- Log in to post comments

