- Photo Safaris
- Alaska Bears & Puffins World's best Alaskan Coastal Brown Bear photo experience. Small group size, idyllic location, deluxe lodging, and Puffins!
- Participant Guestbook & Testimonials Candid Feedback from our participants over the years from our photo safaris, tours and workshops. We don't think there is any better way to evaluate a possible trip or workshop than to find out what others thought.
- Custom Photo Tours, Safaris and Personal Instruction Over the years we've found that many of our clients & friends want to participate in one of our trips but the dates we've scheduled just don't work for them or they'd like a customized trip for their family or friends.
- Myanmar (Burma) Photo Tour Myanmar (Burma) Photo Tour December 2017 -- with Angkor Wat option
- Reviews Go hands-on
- Camera Reviews Hands-on with our favorite cameras
- Lens reviews Lenses tested
- Photo Accessories Reviews Reviews of useful Photo and Camera Accessories of interest to our readers
- Useful Tools & Gadgets Handy tools and gadgets we've found useful or essential in our work and want to share with you.
- What's In My Camera Bag The gear David Cardinal shoots with in the field and recommends, including bags and tools, and why
- Articles About photography
- Getting Started Some photography basics
- Travel photography lesson 1: Learning your camera Top skills you should learn before heading off on a trip
- Choosing a Colorspace Picking the right colorspace is essential for a proper workflow. We walk you through your options.
- Understanding Dynamic Range Understanding Dynamic Range
- Landscape Photography Tips from Yosemite Landscape Photography, It's All About Contrast
- Introduction to Shooting Raw Introduction to Raw Files and Raw Conversion by Dave Ryan
- Using Curves by Mike Russell Using Curves
- Copyright Registration Made Easy Copyright Registration Made Easy
- Guide to Image Resizing A Photographers' Guide to Image Resizing
- CCD Cleaning by Moose Peterson CCD Cleaning by Moose Peterson
- Profiling Your Printer Profiling Your Printer
- White Balance by Moose Peterson White Balance -- Are You RGB Savvy by Moose Peterson
- Photo Tips and Techniques Quick tips and pro tricks and techniques to rapidly improve your photography
- News Photo industry and related news and reviews from around the Internet, including from dpreview and CNET
- Getting Started Some photography basics
- Resources On the web
- My Camera Bag--What I Shoot With and Why The photo gear, travel equipment, clothing, bags and accessories that I shoot with and use and why.
- Datacolor Experts Blog Color gurus, including our own David Cardinal
- Amazon Affiliate Purchases made through this link help support our site and cost you absolutely nothing. Give it a try!
- Forums User to user
- Think Tank Photo Bags Intelligently designed photo bags that I love & rely on!
- Rent Lenses & Cameras Borrowlenses does a great job of providing timely services at a great price.
- Travel Insurance With the high cost of trips and possibility of medical issues abroad trip insurance is a must for peace of mind for overseas trips in particular.
- Moose Peterson's Site There isn't much that Moose doesn't know about nature and wildlife photography. You can't learn from anyone better.
- Journeys Unforgettable Africa Journeys Unforgettable -- Awesome African safari organizers. Let them know we sent you!
- Agoda International discounted hotel booking through Agoda
- Cardinal Photo Products on Zazzle A fun selection of great gift products made from a few of our favorite images.
- David Tobie's Gallery Innovative & creative art from the guy who knows more about color than nearly anyone else
- Galleries Our favorite images
nik Sharpener Pro 3.0 Hands-on Review
nik Sharpener Pro 3.0 Hands-On Review & Tips
Many years ago when I first heard about Sharpener Pro I thought "that's a lot of money just to sharpen an image when Photoshop does it for free." Since then of course, like many of you I've spent countless hours not just sharpening images but using and evaluating many different sharpening products. Until recently my favorite has been Photokit Sharpener from PixelGenius. In particular I really like the way it separates sharpening into three components--Raw "input"-sharpening, "creative" sharpening and "output" sharpening. That dovetails nicely with my workflow where I can apply the input sharpening to the image when I first open it (and even flatten the sharpened layer onto the Background to save space) then use Creative sharpening to accentuate key elements of the image--I always use it with a mask so that I only selectively sharpen portions of the image, and then finally the appropriate output sharpening for the printer and paper I'm using at the time.
But Photokit has two drawbacks for me. First it does not work with Photoshop Elements. As Elements improves its capabilities an increasing number of my safari participants rely on it to edit their images, and many of the articles I write require that examples be doable in Elements, so I needed a solution that would work with both products. And Photokit sharpener, like all the other products I had evaluated, required that I manually create a mask for each image. Frankly with Quick Mask that only takes a few seconds but it does mean that each image has to be opened and edited before I save, post or print it.
nik Sharpener Pro 2.0 worked with both Elements and Photoshop, which was a great plus, but I found I still had to create masks to get the effects I wanted. It also didn't differentiate between the various steps of sharpening. Then this week I heard about nik Sharpener Pro 3.0 which promised solutions to both of these issues. Josh Haftel and the team at nik were kind enough to send me a copy of Sharpener 3.0 to evaluate. I was a little reluctant to take the time to experiment with yet another sharpening product, but it's an important enough step in making images look great that I went for it. To cut to the chase, I am very impressed. Not only does Sharpener Pro 3.0 resolve the short-comings of version 2, but the results really just plain look better. Color contrast in particular is improved.
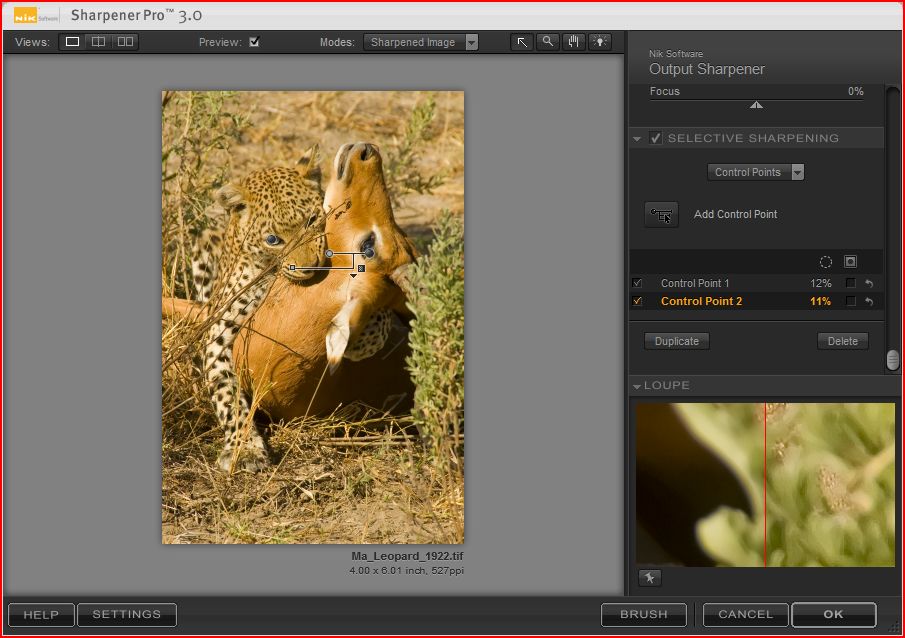
nik Sharpener 3.0 offers a clean interface with its own floating window in Photoshop
Logical Sharpening Settings
|
It's always taken a bit of a math background to sort out the effects of Radius and Threshhold, the traditional settings that can be tweaked for Unsharp Masks. nik has given us all a leg up by introducing a set of fairly logical settings we can use with Sharpener Pro 3.0. The Settings are:
By tweaking these sliders you can control the effect of your sharpening in a relatively powerful but still easy to use way.
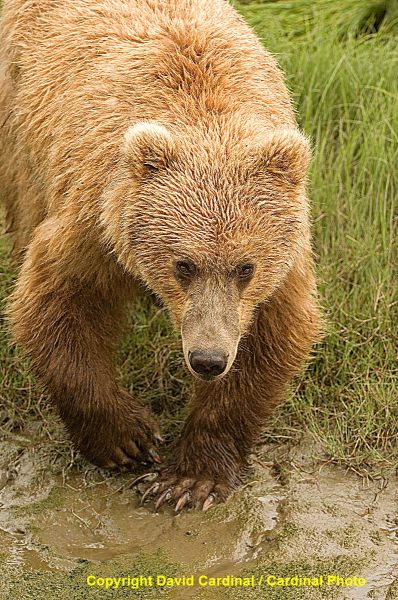
The Grizzly Bear image on the right is a great example of one which is sharpened more effectively by Sharpener Pro 3.0. See the crops below for details. |
 |
U-Point and It Sharpens
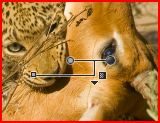 A control point showing adjustment sliders |
One of the biggest new features in Sharpener 3.0 is the addition of nik's unique "U-Point" technology which is also found in their other products including Capture NX. U-Points are a very fast way to select a portion of an image to apply an effect. Each point allows you to set the area it affects as well as the scale of the effect. Personally I've gotten so fast with Photoshop's native Quickmasks on layers and adjustment layers that I haven't made that much use of U-Points. But they offer one big advantage in this case that has me learning them in a hurry. They don't just allow "masking" of the effect, each U-Point can actually modify the effect for it's area. So you can in effect have serveral different sharpening settings working all in the same layer. How cool is that! |
Finally a Smart Filter Workflow
When Adobe first added Smart Objects they were of very limited use to photographers. A little at a time they have been extended and plug-in support for them has expanded. With the release of nik Sharpener Pro 3.0 running on Adobe Photoshop CS3 just about all the pieces for a complete Smart Filter workflow are in place--at least in our studio. With Dfine 2.1 or Noise Ninja 2.2 for noise reduction (I really like Noise Ninja but it's quite convenient to use Dfine since it is integrated with the rest of the nik tools), ColorEfx Pro 3.0 and Curvemeister 3.0 for my color correction and other special effects, and finally nik Sharpener Pro 3.0 for Sharpening I can do all of my work with reversible Smart Filters. That way I can go back and tweak any setting without starting over or even re-doing an entire layer the way I used to. I'm certainly not completely converted to working with Smart Filters as the frequent re-rendering can be slow and I'm very familiar with a layer based workflow, but I'm pretty convinced Smart Objects and Smart Filters (or whatever they will be called in the future) are the way forward because of their large strengths in non-destructive editing and even in smaller image sizes. Of course increasingly speedy computers are an important part of the solution.
It's Just Plain Better
|
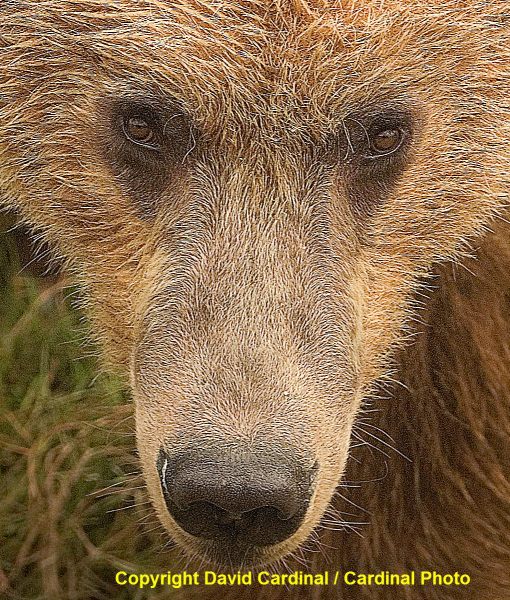
This crop is of the bear sharpened with Sharpener Pro 20 using a Mask. Notice the loss of color detail around the eyes. This version is for an Epson Inkjet so of course it looks odd on screen, but is used to illustrate a sharpening comparison. |
This version is from a Sharpener Pro 3.0 filter applied automatically. Not only does it remove the need for masking in some cases but notice the preservation of color detail & contrast around the eyes. |

Is nik Sharpener 3.0 the Perfect Sharpening Tool?
Well no, of course not. I'm still not completely sold on the Control Point mechanism. In particular for sharpening where rendering to see the effect of various sharpening settings it can be a slow process to evaluate control points unless you are on a speedy machine. And I'd like to see a real separation between "creative" sharpening and output sharpening--so that I can perform the creative sharpening on the image while I'm processing it and then apply output device specific sharpening if and when it gets printed and based on the device I'm printing to at the time. I also found the interaction between the overall sharpening and the sharpening affected by control points to be a little difficult to judge.
You can purchase nik Sharpener Pro 3.0 now from B&H for $199

Latest posts
-
Tue, Jun 14 2022
-
Fri, Jul 9 2021
-
Mon, Mar 1 2021
-
Tue, Mar 3 2020
-
Wed, Jan 15 2020
-
Mon, Nov 11 2019