- Photo Safaris
- Alaska Bears & Puffins World's best Alaskan Coastal Brown Bear photo experience. Small group size, idyllic location, deluxe lodging, and Puffins!
- Participant Guestbook & Testimonials Candid Feedback from our participants over the years from our photo safaris, tours and workshops. We don't think there is any better way to evaluate a possible trip or workshop than to find out what others thought.
- Custom Photo Tours, Safaris and Personal Instruction Over the years we've found that many of our clients & friends want to participate in one of our trips but the dates we've scheduled just don't work for them or they'd like a customized trip for their family or friends.
- Myanmar (Burma) Photo Tour Myanmar (Burma) Photo Tour December 2017 -- with Angkor Wat option
- Reviews Go hands-on
- Camera Reviews Hands-on with our favorite cameras
- Lens reviews Lenses tested
- Photo Accessories Reviews Reviews of useful Photo and Camera Accessories of interest to our readers
- Useful Tools & Gadgets Handy tools and gadgets we've found useful or essential in our work and want to share with you.
- What's In My Camera Bag The gear David Cardinal shoots with in the field and recommends, including bags and tools, and why
- Articles About photography
- Getting Started Some photography basics
- Travel photography lesson 1: Learning your camera Top skills you should learn before heading off on a trip
- Choosing a Colorspace Picking the right colorspace is essential for a proper workflow. We walk you through your options.
- Understanding Dynamic Range Understanding Dynamic Range
- Landscape Photography Tips from Yosemite Landscape Photography, It's All About Contrast
- Introduction to Shooting Raw Introduction to Raw Files and Raw Conversion by Dave Ryan
- Using Curves by Mike Russell Using Curves
- Copyright Registration Made Easy Copyright Registration Made Easy
- Guide to Image Resizing A Photographers' Guide to Image Resizing
- CCD Cleaning by Moose Peterson CCD Cleaning by Moose Peterson
- Profiling Your Printer Profiling Your Printer
- White Balance by Moose Peterson White Balance -- Are You RGB Savvy by Moose Peterson
- Photo Tips and Techniques Quick tips and pro tricks and techniques to rapidly improve your photography
- News Photo industry and related news and reviews from around the Internet, including from dpreview and CNET
- Getting Started Some photography basics
- Resources On the web
- My Camera Bag--What I Shoot With and Why The photo gear, travel equipment, clothing, bags and accessories that I shoot with and use and why.
- Datacolor Experts Blog Color gurus, including our own David Cardinal
- Amazon Affiliate Purchases made through this link help support our site and cost you absolutely nothing. Give it a try!
- Forums User to user
- Think Tank Photo Bags Intelligently designed photo bags that I love & rely on!
- Rent Lenses & Cameras Borrowlenses does a great job of providing timely services at a great price.
- Travel Insurance With the high cost of trips and possibility of medical issues abroad trip insurance is a must for peace of mind for overseas trips in particular.
- Moose Peterson's Site There isn't much that Moose doesn't know about nature and wildlife photography. You can't learn from anyone better.
- Journeys Unforgettable Africa Journeys Unforgettable -- Awesome African safari organizers. Let them know we sent you!
- Agoda International discounted hotel booking through Agoda
- Cardinal Photo Products on Zazzle A fun selection of great gift products made from a few of our favorite images.
- David Tobie's Gallery Innovative & creative art from the guy who knows more about color than nearly anyone else
- Galleries Our favorite images
SmartDesk 2: Finally, an affordable, automated, stand-sit desk for your studio
SmartDesk 2: Finally, an affordable, automated, stand-sit desk for your studio
Submitted by David Cardinal on Mon, 03/06/2017 - 08:18
 For years its been known that working standing up – at least part of the time – can be good for your back. As photographers, most of us work standing up quite a bit. But unlike when shooting film and spending nights in the darkroom, many of us spend long days on the computer, and it is all too easy to not move around or stand up enough. There are a number of very nice motorized desks on the market, but they have typically cost as much as your DSLR. Not everyone can, or wants to, afford that. So it is with great interest that we’ve been watching the rollout of Autonomous.ai’s new SmartDesk 2. The company has been selling SmartDesks for a couple years, but version 2 has some significant changes – including better-built motors and controls. We’ve been testing the dual-motor Business Edition.
Customize to your heart’s content
In my heart I know that the perfect post-processing workspace consists entirely of middle-gray furniture, and has no windows. Of course that would suck, so we have a lot of wood and light in our studios here. You can get the SmartDesk in a conventional White or Black (probably best if you want the ideal environment for color matching), but you can also get it in Walnut, Oak, or Bamboo. We picked Oak as both a nice, light, color and as the most neutral of the three wood finishes. Similarly you can get the desk as a solid (or long) rectangle, or with a gentle or rounded cutout. It really depends on how you set up your work area, and whether you shift back and forth from left to right a lot.
Unboxing – Build and finish
The SmartDesk 2 is a solid piece of gear, and appropriately heavy. You’ll probably want two people to haul the boxes (one for the base and one for the top) around. The top, which also has a nice, solid, feel, only has a thin veneer of the wood finish, so be careful not to bash it into something while you’re moving it, or it will scratch. The pieces were all protected in their cases, and the electronics and frame pieces had their own foam cutouts within their thick box. UPS still managed to thrash ours around a bit, but despite some crushed package corners, the contents were fine. Assembly instructions are, unfortunately but not surprisingly, terse and not always easy to follow. Fortunately, it’s not all that complicated to assemble, and if you look closely enough the illustrations are pretty helpful. In its home markets Autonomous does offer an optional assembly service. Going the other way, you can get a DIY kit where you supply your own desktop. That could be pretty cool if you have existing furniture or a preferred style you want to match.

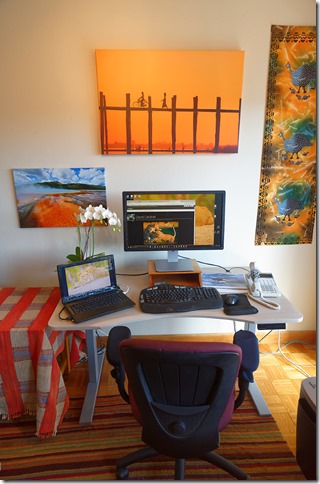
Once assembled the desk has a clean look and is a very practical solution to sitting and standing.
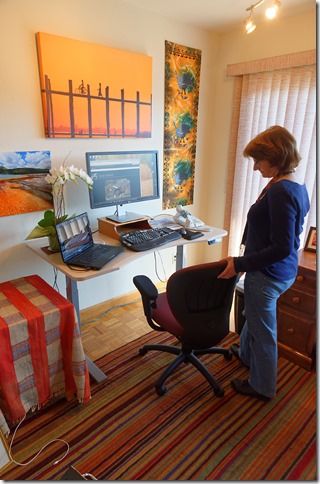
You can see one set up here in our office.
Assembly tips
Putting the desk together is similar to assembling a piece of IKEA furniture. Because the tolerances are exact, in a couple places you have to be careful to only loosely attach one part until you make sure that another part can also be attached. That’s about what I’d expect for such a substantial piece of furniture at this type of relatively-low price. There are a few tips we figured out that weren’t in the manual that we think are worth passing along. First, it helps if you magnetize the provided Allen (hex) wrench (or one of your own). Some of the hex bolts are recessed, and you can easily lose them into the interior of a rail (it’s annoying to fish them out) if you’re not careful. You can get a tool magnetizer for a few bucks from a hardware store or Amazon. Second, the little rubber bumpers that go between the frame and the top don’t stay in place by themselves very well. We used clear tape to hold them in place until we could get the assembly in place to screw them in. Clear tape is helpful because you need to line up the holes in the frame with the holes in the desk top. Third, pay attention to the part where it suggests leaving some of the bolts loose until you have the others at least started. In our case, the pieces did all fit together, but required a little fiddling, which the loose bolts allowed. After that, do tighten them all, of course. Finally, there are a lot of hex-head (Allen key) bolts (machine screws, to be more precise), so a power drill or electric screwdriver with hex-head bits might come in handy.

The best part is that moving between standing and sitting is as simple
as pressing one of the memory buttons and watching the desk
In our case, we also happened to get a desk with one bad motor. The company sent us a new one right away, but since we had already fully-assembled the desk, it was a bit of a pain to replace it. In hindsight, I think I’d connect all the electronics and test them before assembly. I’m not sure the company would recommend that, as you'd want to make sure you don’t do anything stupid, as the motors will activate and start pushing things around. Another tip is that you might want to assemble it in place, as it is not easy to move or get through doorways once you have it together.
Using the desk
The desk itself is trivial to use. The Up and Down buttons are self explanatory, and it also has four memory positions. Most people will only need two, but if you share the desk with someone else, or move from a chair to a stool, or want to use it as a platform for product shots, then more are helpful. Speaking of product shots, if you can afford to have a second desk, it makes a really-great platform for shooting any type of small subject. You can get it at just the right height, and it’s large enough to accommodate a LightHouse or other softbox-like setup.

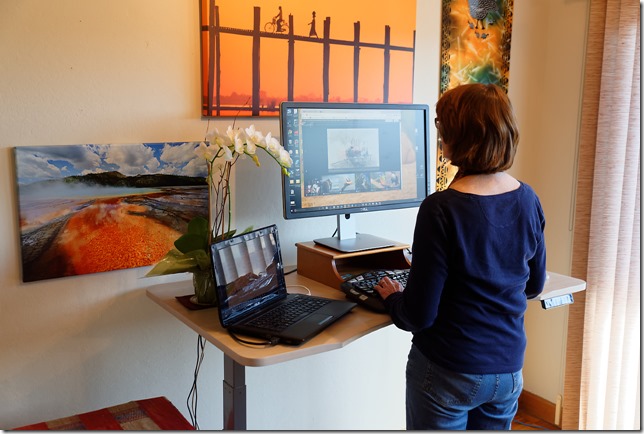
As long as you leave enough clearance around the desk, and enough slack in any cables, it works perfectly
in both sitting and standing position.
SmartDesk or Varidesk?
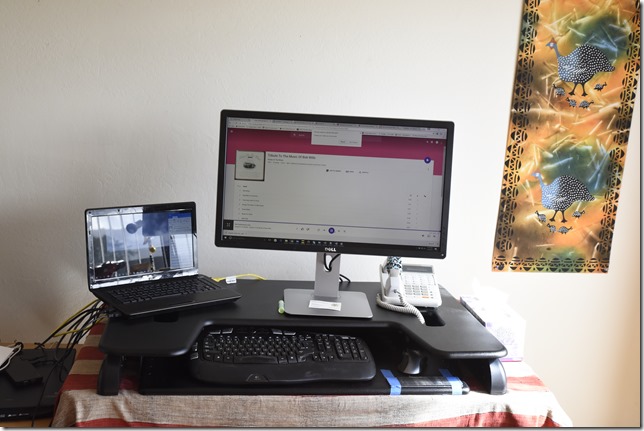
The other solution in a similar price range is a Varidesk. We’ve had one of those for about a year, and really like it. It is spring loaded so it isn’t that hard to raise or lower, but by its nature it consumes a lot of your usable desk space, and the keyboard and mouse cutout can be awkward if you have both a full-size keyboard and a mouse. So far, ours has been very reliable, but there is no question the SmartDesk is a major upgrade, and not all that much more expensive.

Before the “makeover” this Varidesk did a good job for us. But you can see that because the mechanism
needs to be on top of the desk, it is more crowded and less roomy. The space between the keyboard and
mouse and the monitor top is also fixed, so it can be cramped if you have a large keyboard.
When I was researching sit-stand desks I noticed that there were a lot of negative reviews about versions of this desk, which gave me pause. However, for the most part they referred to an earlier, less-expensive version, and in some cases customers who thought they’d purchased a 2-motor version that was later re-designed to a single motor. There were also issues about the accuracy of the pre-drill holes and assembly difficulty. We can only comment on the unit we received, which was solid, contained all needed parts, had correctly-predrilled holes, and I would be happy to recommend. As I mentioned earlier, the assembly instructions could be better, but it was substantially easier to assemble than our daughter’s IKEA filing cabinet.
Home or Business Edition?
The Home Edition of the Smart Desk 2 comes with a single motor, and is rated for 220 pounds. The Business Edition has two motors, and is rated for 300 pounds. It can also rise to 51-inches versus 47-inches for the Personal Edition, and comes with a 5-year warranty instead of a 1-year warranty. We tested the Business Edition, and from reading comments and reviews of the Personal Edition, we’d suggest getting the Business Edition if you can afford it. Having the desk motorized equally on both sides just seems like a lot better long-term solution.
Pricing depends on the exact model you order. The cheapest is a Personal Edition with plain rectangular top for $299. A cut-out bumps that by $50. The Business Edition starts at $399 for the rectangular version, also with an additional cost of $50 for the cut-out versions, and the XL (70-inch wide instead of 50-inch wide) top bumps it up to $549. For some sizes the colored wood finishes also increase the cost. There are some older versions of the SmartDesk that you can get from online retailers, but to get the current design, and customization options, your best bet is to head to the company’s website, or to one of its new showrooms in New York, Santa Monica, or San Francisco.
- Log in to post comments

